
Are you feeling the pressure of a busy and hectic lifestyle? Are you searching for ways to increase your flexibility and find inner peace? Look no further than a daily yoga practice! Yoga has been practiced for thousands of years and has proven benefits for both physical and mental health. In this blog post, we will explore how incorporating a daily yoga practice can help reduce stress, improve flexibility, boost immunity, increase strength and balance, enhance focus and concentration, and so much more. Get ready to roll out your mat as we dive into the amazing benefits of a regular yoga routine!
What is Yoga?
Yoga is a physical, mental, and spiritual practice that originated in India. The word yoga comes from the Sanskrit word yuj, which means “to yoke” or “to unite.” Yoga is often referred to as a union of the body, mind, and spirit.
The physical practice of yoga consists of poses (asanas) and breath work (pranayama). The poses vary in difficulty from beginner to advanced, and can be modified to suit any level of fitness. The breath work helps to calm the nervous system and can be used as a tool to focus the mind.
The mental and spiritual aspects of yoga are just as important as the physical practice. Yoga encourages us to be present in the moment and aware of our thoughts and feelings. It also teaches us how to let go of judgment, cultivate compassion, and find inner peace.
There are many different styles of yoga, but all have the same goal: to promote health and well-being on every level – body, mind, and spirit.
Benefits of Practicing Yoga on a Regular Basis
When it comes to finding a workout that offers something for everyone, look no further than yoga. This popular form of exercise has been around for centuries and is known for its ability to provide a comprehensive workout for the mind and body. While there are many different styles of yoga, all forms provide a multitude of health benefits. Here are just a few of the benefits you can experience by practicing yoga on a regular basis:
Yoga is an excellent way to reduce stress and promote relaxation. If you’re looking for a workout that will help you unwind after a long day, yoga is perfect. The slow, steady movements and deep breathing help to calm the nervous system and clear the mind. With regular practice, you’ll notice a decrease in stress levels and an increase in overall feelings of well-being.
Looking to boost your energy levels? Yoga can help with that too! The gentle movements and stretches help to increase blood flow and oxygenation throughout the body, resulting in more energy and vitality. If you’re feeling sluggish or run down, give yoga a try – you may be surprised at how invigorating it can be!
In addition to reducing stress and increasing energy levels, yoga can also improve flexibility, strength, and balance. Whether you’re a beginner or an experienced yogi, there’s always room to grow in your practice. With regular stretching and strengthening exercises, you’ll notice increased flexibility and improved muscle tone over time. As your balance improves, you’ll
Different Types of Yoga Practices
The benefits of yoga are vast and well-documented. But with so many different types of yoga practices out there, it can be tough to know where to start. Here is a breakdown of some of the most popular types of yoga, so you can find the perfect fit for your needs and goals.
Hatha Yoga: This type of yoga focuses on physical postures, or asanas. Hatha classes are a good choice for beginners, as they move at a slower pace and emphasize proper alignment.
Vinyasa Yoga: Vinyasa, also called flow yoga, is a more active form of yoga that links breath with movement. Classes are typically faster-paced and may include inversions and arm balances. If you’re looking for a workout, vinyasa is a great option.
Tips for Starting a Daily Yoga Practice
Assuming you’re a beginner to yoga, here are a few tips to help get you started on a daily yoga practice:
1. Set realistic goals. Don’t try to do too much too soon or you’ll quickly become overwhelmed and frustrated. Maybe start with just 3-5 days a week for 20-30 minutes each day.
2. Choose a time of day that works for you and make it part of your daily routine. Doing yoga first thing in the morning can help set the tone for the rest of your day or wind down at night with some gentle stretches can help you relax and prepare for sleep.
3. Find a comfortable place to practice where you won’t be interrupted. This could be in your living room, bedroom, or even outside in your backyard!
4. Invest in a mat and any other props you might need like blocks, straps, or blankets. There are plenty of affordable options available online or at your local store.
5. Start slow with basic poses and breathing exercises then gradually work up to more challenging ones as you get stronger and more flexible. There are endless possibilities when it comes to yoga so find what feels good for your body and don’t overdo it!
How to Set Up Your Home Practice Space
When it comes to setting up your home practice space, there are a few key things to keep in mind. First, you’ll want to find a quiet, secluded spot in your home where you won’t be disturbed. This could be a corner of your bedroom or a spot in your basement. Once you’ve found your space, clear away any clutter and make sure there’s enough room for you to move around freely.
Next, you’ll need to gather some essential yoga props. A yoga mat is a must, of course, but you might also want to invest in a yoga block or two and a strap. These props will help you safely practice some of the more challenging yoga poses.
Finally, take some time to create an atmosphere that’s conducive to relaxation and focus. dim the lights, light some candles or incense, and play some calming music. Once you’ve created a peaceful environment, you’re ready to begin your yoga practice!
Building Flexibility with Props and Modifications
When it comes to props, the most important thing is to use what you have on hand. If you have a yoga mat, great! If not, a towel or blanket will do the trick. And if you don’t have either of those, no worries – you can always practice yoga on a bare floor. As for modifications, there are endless possibilities and variations depending on your individual needs and abilities. Here are just a few ideas to get you started:
If you have trouble balancing, try standing near a wall or using a chair for support.
If you have wrist pain, try placing your hands on blocks instead of directly on the floor.
If you’re pregnant or have other health concerns, be sure to consult with your doctor before trying any new poses or modifications.
The bottom line is that there’s no “right” way to do yoga – so don’t be afraid to experiment and find what works best for you.
Meditation Techniques to Complement Your Yoga Practice
There are many different yoga styles and each offers its own set of benefits. Hatha yoga, for example, is a slow-paced form of yoga that focuses on gentle movements and holding poses for a longer period of time. This type of yoga is great for beginners or those looking to improve their flexibility. Vinyasa yoga, on the other hand, is a faster-paced form of yoga that focuses on linking breath with movement. This type of yoga is great for those looking to build strength and stamina.
But what about meditation? Can meditation complement your yoga practice? The answer is yes! Meditation can help you focus your mind and body while practicing yoga. It can also help you find inner peace and calmness. Here are some meditation techniques to try:
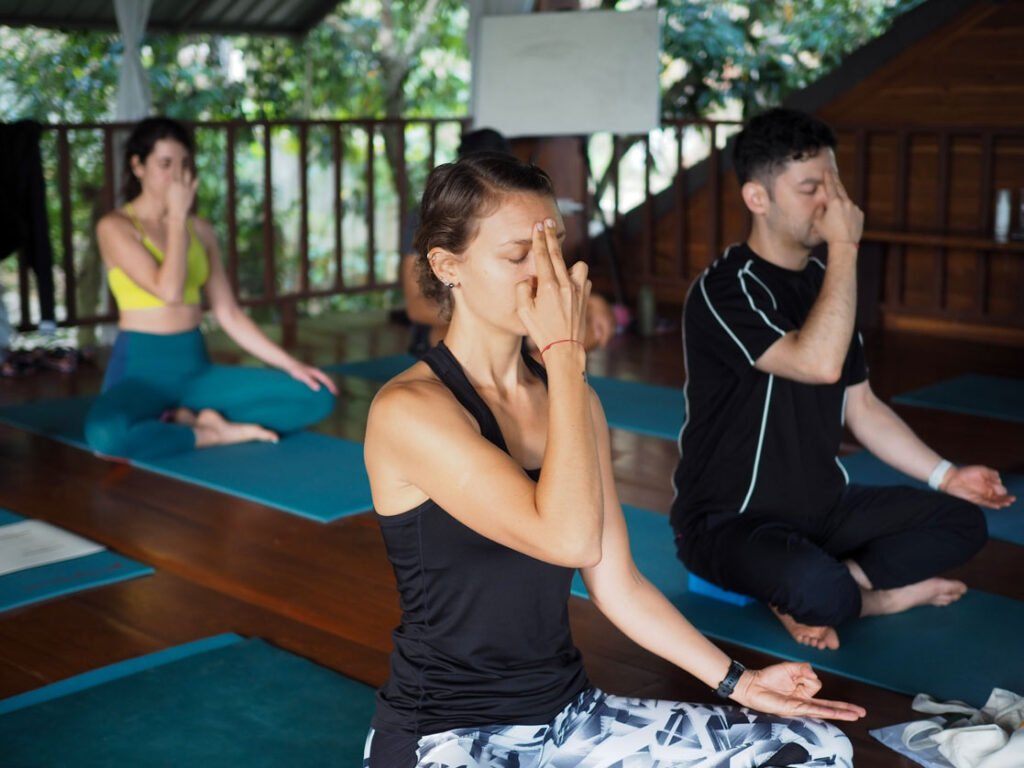
1. Breathing Meditation: Focus your attention on your breath as you inhale and exhale. Observe the rise and fall of your chest or abdomen with each breath. Don’t try to control your breath, just let it flow naturally.
2. Body Scan Meditation: Slowly scan your body from head to toe, noticing any tension or areas of discomfort. Once you’ve identified an area of tension, focus on breathing into that area until you feel the tension start to release.
3. Guided Meditation: Find a comfortable position and close your eyes. Listen to a guided meditation recording or follow along with a written script. You may want to focus on a certain topic
Conclusion
The benefits of a regular yoga practice can be enjoyed by anyone and everyone. From helping to reduce stress and anxiety to improving balance and flexibility, yoga has a wide range of benefits for the body and mind. Whether you are just starting out or already have an established practice, yoga is accessible to all levels of practitioners with modifications available for each pose. Give it a try today and see how your own personal experience with yoga could benefit you!
When it comes to waking up from bed, there are many ways in which you can get a great wake-up stretch that will leave you feeling energized and ready for the day. From these 5 morning stretches, you should be able to choose one that is most suitable for your own needs!
 5 Morning Stretches That You Can Do From Bed
When you wake up in the morning, it is important to stretch to improve your flexibility and circulation. Here are 5 stretches that you can do from bed:
1. The Cat-Cow Stretch
Start on your back with your legs bent at a 90-degree angle, and your feet flat on the floor. arch your back up so that you are resting on your heels and your buttocks are off the bed. Hold for 10 seconds, and then repeat on the other side.
2. The Table Top Stretch
Lie on your back with your hands at your sides and your feet flat on the bed. Keeping your buttocks off the bed, slowly lift one leg towards the ceiling until you feel a stretch in the lower back. Hold for 10 seconds, and then switch legs.
3. The Glute Bridge
Lie flat on your back with both feet flat on the floor and arms at your sides. Drive both heels into the ground, and lift your torso and upper legs into the air. Hold for 30 seconds, and then slowly lower yourself to the ground.
4. The Hamstring Curl
Kneel on one foot with the other knee bent so that you are leaning forward, and place a dumbbell hand on the floor for support. Keeping both with your back straight, lift one leg towards your chest until you feel a stretch in the back of the leg. Lean forward at the same time to get a deep stretch in the hamstrings. Hold for 30 seconds, and then switch legs.
5. The Standing Calf Raise
Stand up tall with feet shoulder-width apart, gripping dumbbells or plates at chest level. Slowly raise both arms straight up over your head, keeping your shoulders relaxed. As you reach chin level, slowly bend your knees and bring them down toward each other until they are nearly touching while holding yourself up with your arms and dumbbells or plates.
Reasons to Stretch at Home
There are many reasons to stretch at home. Not only will it improve your physical health, but it can also help you get a better night’s sleep. Here are three reasons to stretch at home:
1) Stretching before bed can help you relax and fall asleep faster.
2) When you’re relaxed, you’re less likely to experience anxiety or stress during the night.
3) Stretching before bed can also help you wake up feeling refreshed and energized in the morning.
So why not give stretching a try tonight? It might just be the best decision you make for your health and sleep schedule!
Recommended Morning Stretches
There are several recommended morning stretches you can do to help you wake up and start your day off on the right foot.
The first recommended stretch is called the cat-cow. This stretch starts by lying on your back with your knees bent and your feet flat on the floor. You then lift your head and shoulders off of the bed, and pull your stomach in towards your spine. Hold for 30 seconds, and release.
The next recommended stretch is the child’s pose. If you are able to sit up in bed without assistance, begin by lying down with your legs stretched out in front of you. Place your hands behind your head, and press down into your palms as you lift your torso upward. Hold for 30 seconds, and repeat two more times.
If you are unable to sit up in bed, try the seated forward fold. Sitting upright in bed with your legs stretched out in front of you, fold forward until you are sitting on the edge of the bed with your forehead resting on your knees. Hold for 30 seconds, and release.
A few notes on doing morning stretches
Stretching before bed can help to get your body ready for the day ahead. Here are a few notes on how to do morning stretches:
1. Start by lying down on your back with your feet flat on the ground.
2. Bend your knees and bring them towards your chest, then press them forward again.
3. Hold the position for a few seconds, then slowly release the stretch.
4. Repeat the exercise three times, alternating legs each time.
Staying fit is important for your mental as well as physical health. If you spend all day tucked away in a desk chair, it can be difficult to manage your personal fitness goals. In this post, I share a list of some of the absolute best yoga poses to practice after sitting all day!
What Stretches Should You Do After Sitting All Day?
When you sit all day, your muscles and joints are stiff. This means that the stretches you should do after sitting all day are different from the stretches you would do if you were active. The following stretches will help to loosen up your muscles and joints, and make them more flexible.
1. Hamstring Stretch
Lie on your back with your feet flat on the floor, legs bent at the knee. Gently pull your heels towards your buttocks while keeping your hips pressed down into the floor. Hold for 30 seconds and repeat two times.
2. Quadriceps Stretch
Lie face down with both knees bent to 90 degrees and heels pulled towards your buttocks. Arms should be by your sides with palms facing down. Push your hips and pelvis up off the floor and hold for 30 seconds.
3. Shoulder Stretch
Stand up with feet shoulder-width apart and hands on hips. Bend forward from the waist until you feel a mild tension in the back of your neck, then slowly return to the starting position. Hold for 30 seconds, then repeat three times.
Inversions
Finding the best yoga poses to practice after sitting all day can be a challenge. However, there are a few inversions that are ideal for improving your posture and relieving tension in your body. Here are five of the best poses to try:
1. Cat-Cow
This inversion is a gentle pose that targets the lower back and hips. It helps to alleviate tension in these areas, as well as the neck and head.
2. Child’s Plank
Another great pose for targeting the lower back and hips, Child’s Plank also stretches the ankles and calves. It can also help to reduce stress levels in the neck and shoulders.
3. Dolphin
This pose is great for stretching the entire spine, including the neck and upper back. It can also improve circulation and help to relieve tension in the shoulders and neck.
4. Hand-To-Big-Toe
This pose is another great way to stretch the entire spine, including the neck and upper back. It also tones the arms, legs, abdomen, buttocks, and thighs.
5. Happy Baby
This inverted variation of Child’s Plank is perfect for those with tight hips , low back pain, and/or scoliosis. It’s also great for relieving stress in the back.
Backbending Poses
The best yoga poses to practice after sitting all day are backward bending poses. This is because they help to stretch the spine and relieve tension in the lower back. Backbends also improve your balance and coordination, which can help you avoid falls. The following poses are some of the best ones to do after sitting all day:
1. Child’s pose
This pose is gentle on the hamstrings, calves, and thighs, and it is a great way to relax the body and clear your mind. To do it, lie down on your back with your feet flat on the floor, shoulder-width apart. Bend your knees and pull your shoulder blades down and back. Hold for 10 to 15 seconds before slowly coming up.

2. Cat/Cow pose
This pose helps to stretch the hip flexors, quadriceps, abs, and spine. To do it, lie down flat on your back with both legs bent at the knee so that your heels are hanging off the edge of the bed or bench.

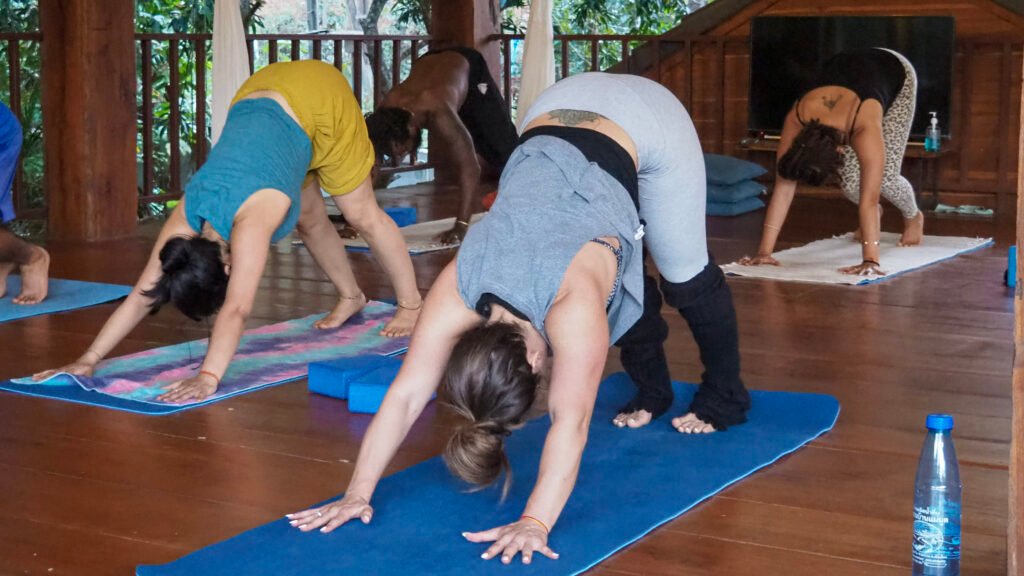
3. Downward Dog
Sitting all day can lead to tension and pain in the lower back. Downward dog is a great pose to relieve this tension and promote good back health. Other great poses to practice after sitting all day are the cat pose and the cow pose.
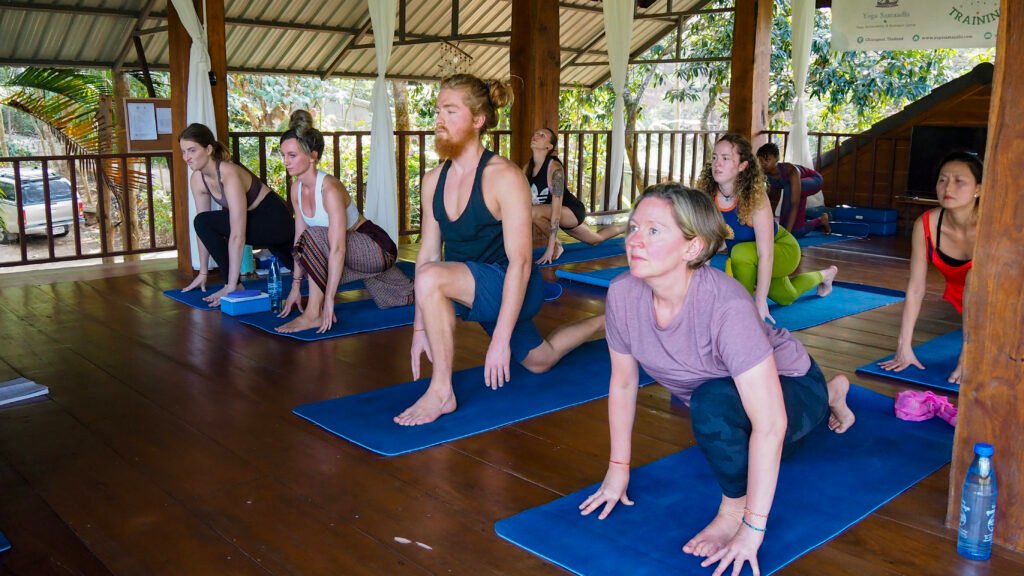
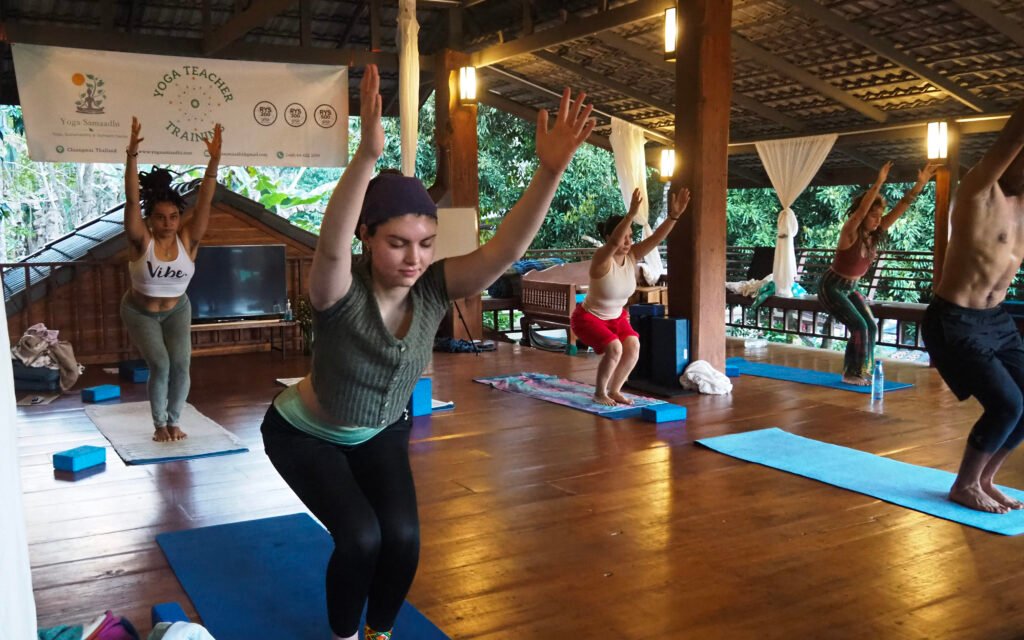
Standing Poses
If you’ve been sitting all day, it’s time to buck up and get moving with some of the best yoga poses for standing.
1. Warrior I
Start in plank position with your hands on the floor directly under your shoulders and your feet hip-width apart. Drive your heels into the ground, lift your torso up, and extend your arms straight out in front of you. Hold for 30 seconds, then repeat on the other side.

2. Triangle pose:
From Warrior I, step one foot back so that your heel is resting next to your opposite ankle and your front knee is bent to 90 degrees. Reach behind you with your left hand and hold onto the ankle of your right leg, then lift that leg up towards the sky so that it’s parallel to the ground. Reach out through the triangle pose with your right hand, then switch legs and repeat. Hold for 30 seconds, then switch sides.

Seated Forward Fold:
Start on all fours with your knees under your hips, then allow your fingers to rest lightly on the ground behind you. Hold onto toes or a chair while keeping thighs pressed together, then lift torso up into a Forward Fold position with arms straight out in front of you (or with an arm draped over a chair’s back). Allow shoulders to relax away from ears as you fold over from the hips. Hold for 30 seconds before switching sides.
Twist Pose (Utkatasana)
The twist pose is a great pose to practice after sitting all day. It helps to stretch out your back and hips, and it can also help relieve tension in your neck and shoulders. To do the twist pose, sit down with your legs crossed in front of you, resting your hands on your thighs. Fold forward until you are sitting on your heels, then press your palms into the floor and lift your chest up towards the sky. Hold this position for a few seconds, then slowly release all of the tension in your body and sit back down on the floor.
Seated Twists
Sitting for long periods of time can cause tightness and tension in the neck, shoulders, and upper back. To counteract these effects, try some of the following yoga poses after sitting all day.
1. Seated Twist: This pose is recommended for people who have been sitting for a long time. Sit with your spine straight, lean your torso to the side, and place your hands on your lap. Twist your torso to the other side, and hold for 30 seconds. Repeat on the opposite side.
2. Camel: This pose is also good for people who have been sitting for a long time. Lie down on your back with both legs bent at the knee and feet flat on the ground. Place palms flat on the floor next to each other, and press into them to lift your hips and chest off the floor. Hold for 10-15 seconds before lowering back down.
Conclusion
If you’ve been sitting all day at your desk, it’s time to break out the yoga! Yoga is a great way to relax and de-stress, and some of the poses are especially good for relieving tension in the lower back after sitting for long periods of time. Here are five poses that you can do after sitting all day.
All those of you who have been exercising for a long time, and are a professional already know about core exercises. Many people think that only aerobic exercises help to lose weight and look lean. However, you should know a fact. When you lose weight through aerobic exercises, it may lead to sagging of the skin. More often, than not, you only tend to lose the water content in the body. If you practice core strengthening, you will see your muscles getting toned eventually. Core exercises are an integral part of a comprehensive fitness program.
You should know about a few benefits of core exercises, before delving into yoga for core strengthening.
Benefits of Core Exercises
1. Core exercises improve your balance as well as stability. You can impact your pelvic muscles, lower hip muscles, and abdomen in a positive manner. No matter, if you are an athlete or want to engage in daily activities, such exercises will help to make your core muscles stable.
2. You can do core strengthening exercises quite easily, and anywhere. It is due to the fact that they do not require any sort of specialized equipment. If you use your back muscles and abdominal muscles in a co-ordinated manner, it can strengthen your core.
3. When you have strong core muscles, you can go about your daily tasks, without fail. On the contrary, weak core muscles can lead to poor posture and back pain.
Apart from your quintessential fitness program, and gym equipment, you can also strengthen your core muscles. Here we are talking about yoga. Yoga poses can help in core strengthening.
Five Yoga Poses That Are Good for Core Strengthening
Shalabha Asana –
You may also hear the name locust pose associated with the yoga pose. This is a staple in most yoga classes. If you suffer from any kind of shoulder disorder, like frozen shoulder, then also you can practice this. The pose helps to strengthen the back muscles and also opens up the chest. It also leads to the strengthening of the entire core. You have to perform this asana, by lying face down on the floor. The arms should be by your torso, on either side, with palms up. With the forehead as support, you should slowly lift both your legs stretched straight to a certain height, as per your comfort. Your glutes and hamstrings should contract, as you lift both legs upward. You also need to lift your pelvis, to lift your stomach from the floor. This are one of the best core strengthening exercises, that you can do today. It also aids in digestion and alleviates back pain.

Nauka Asana –
The boat pose can be as challenging, as you make it. It makes you pull your lower abdominals together, to lift your legs up. If you cannot pull your legs straight in the first place, do not worry. Most of you may not be accustomed to such poses, and your hamstrings may be tight. Just extend your legs as long as you can, and allow your hip flexors to relax and focus on the abs. You can just lie down on your back, and inhale and exhale deeply while lifting your chest and legs off the floor. You ought to keep your arms stretched forward, while pointing your fingers towards the feet. Your buttocks should touch the floor. The body resembles a boat in this pose. This pose helps in the strengthening of the core muscles.
Ekapadasana –
You need to perform the asana, while standing on one foot. It is very difficult to balance the entire body, on one foot. However, you can achieve equilibrium, with practice. The asana is all about balancing. This pose helps you to focus on lengthening your body. You need a lot of core strength, to keep your body in that position. In the process, you need to pull the abdomen towards the spine. You can perform the asana, by standing straight on the ground. Raise both the hands above the head. Inhale slowly while doing so. You need to expand your chest, while doing so. Bring both hands together, and interlock the fingers. You have to bend your body forward, whilst in this pose. And, while doing so, lift one leg up and maintain it parallel to the ground. Hold the pose, and then release and come back to the original form. Repeat on the other side.
Bakasana –
This is quite a challenging pose, which can strengthen your core muscles like no other. It is basically an arm balance pose, which needs you to contract your core abdominal muscles. The transverse abdominus muscles work quite hard. You can start the pose from standing position, if it suits you. Slowly bend forward, while sticking your knees into the back of your elbows or biceps. Before, attempting this stance, you need to fold your knees a bit, and try to place the palms on the ground for support. Now, begin to push your weight forward, on your arms. First, try the pose with one leg if you are a beginner. For professionals, you can achieve the final pose in one go, with both your legs. This is one of the best yoga exercises, to strengthen your core muscles.

Chaturanga Dandasana –
You can do this pose, with ease. This may seem to be an upper-body focussed pose. However, it actually strengthens your core muscles as well. It is also quite popular as the four-limbed staff pose. You have to start the asana with Vajrasana. You have to stretch your hands forward, and take up the plank pose. Straighten your legs backwards. And, support the legs on the toes. Exhale and bend your elbows, until the shoulders are at the same height as the elbows. You can hold the pose.
This asana strengthens the back and abdominal muscles. Moreover, you can also maintain core stability. Sportspersons love to practice this exercise.
These are a few of the poses in Yogasana, that can give other new age fitness activities a run for their money. Try these out today, empty stomach and early in the morning, to strengthen your core muscles.
Yoga Samaadhi Upcoming Events Sustainability Activity | Outreach Program | Yoga Teacher Training (Chiang Mai, Thailand)

Read Our Blog
Read our articles on different topics of yoga, sustainability and community updates…
More Details
Yoga TTC in Thailand
Learn about yoga teacher training and how it guides you to a harmonious lifestyle…
More Details
Community Outreach Programs
Find out more about hill tribes, their ways of life and how we can take part in their progress…
More Details
Sustainability Activity
Find spirituality in sustainability, living in harmony with nature and adopting mindfulness…
More Details