Swing by as strength and grace meet on the yoga mat! In case you want to become more confident in your practice and learn more about physical balance and expansion, Ashwa Sanchalanasana, also known as the Equestrian Pose, is going to become your latest asset. Besides improving flexibility, this dynamic pose is also a core building exercise therefore a compulsory practice among any level yogis. Whether you want to become an expert on the topic, or you simply want to take on the first steps in practicing Ashwa Sanchalanasana, we are going to explore the concept with the focus on this incredible pose that will make both you and your body feel better than ever before. Well, we are going to have the saddle and ride into the world of yoga!
Ashwa Sanchalanasana, or Equestrian Pose, is a special yoga position that would encourage you to feel strong and graceful. Think of yourself as a rider on horseback, solid standing, and ready. This asana not only improves your physical conditions, but it also makes you connect to your breath and the spirit.
Based on the ancient customs, Ashwa Sanchalanasana poses a unique opportunity to develop strength, as well as flexibility to its practitioners. This pose offers benefits to a beginner yoga practitioner as much as it does to an experienced yogi. Prepare to dive into its interesting history, its many advantages, and handy hints to learning how to execute the art of Ashwa Sanchalanasana in your practice. So, come along with me!
Equestrian Pose or Ashwa Sanchalanasana is a very old Indian yoga pose. Its name is described as Horse Rider Pose since the same position is associated with riding horses.
In Hindu culture, in the past, the pose is related to the activity of warriors. Words about physical positions full of power and elegance that were covered in ancient writings even in times when warriors were idols.
That pose is dynamic and a combination of balance and stability. It takes its cue on the equestrian techniques to maneuver rugged terrains by horse riding.
Ashwa Sanchalanasana in some schools of yoga is an exercise focused both on the development of physical skills and concentration. This is because it is a favorite whenever there needs to develop a resilience combined with flexibility according to the practioners.
References to this pose may be traced in such classical sources as Hatha Yoga Pradipika, establishing its fixed position in traditional yoga tradition but evolving to fit the contemporary practice.
Ashwa Sanchalanasana also known as Equestrian Pose has myriad of advantages and is not limited to the physical level.
In terms of physical condition, this pose will enhance the strength of legs, core, and back besides making the hips and thighs more flexible. It makes your body open in case of deeper stretches and better posture.
Mentally, Ashwa Sanchalanasana brings in a sense of concentration and integration. The grounding aspect assists to slow racing thoughts as you coordinate your breath with motion.
Spirually, this pose is good as it promotes mindfulness. Every change offers a chance to be in touch with inner power and perseverance.
Moreover, it enhances circulation of energy in the body. This refreshing nature can give you a positive feeling and get rid of dizziness.
By adopting this pose into the regimen, one will achieve a sense of well-being by striking an equilibrium between the body-mind connection, and a balance of self-awareness; at all levels.
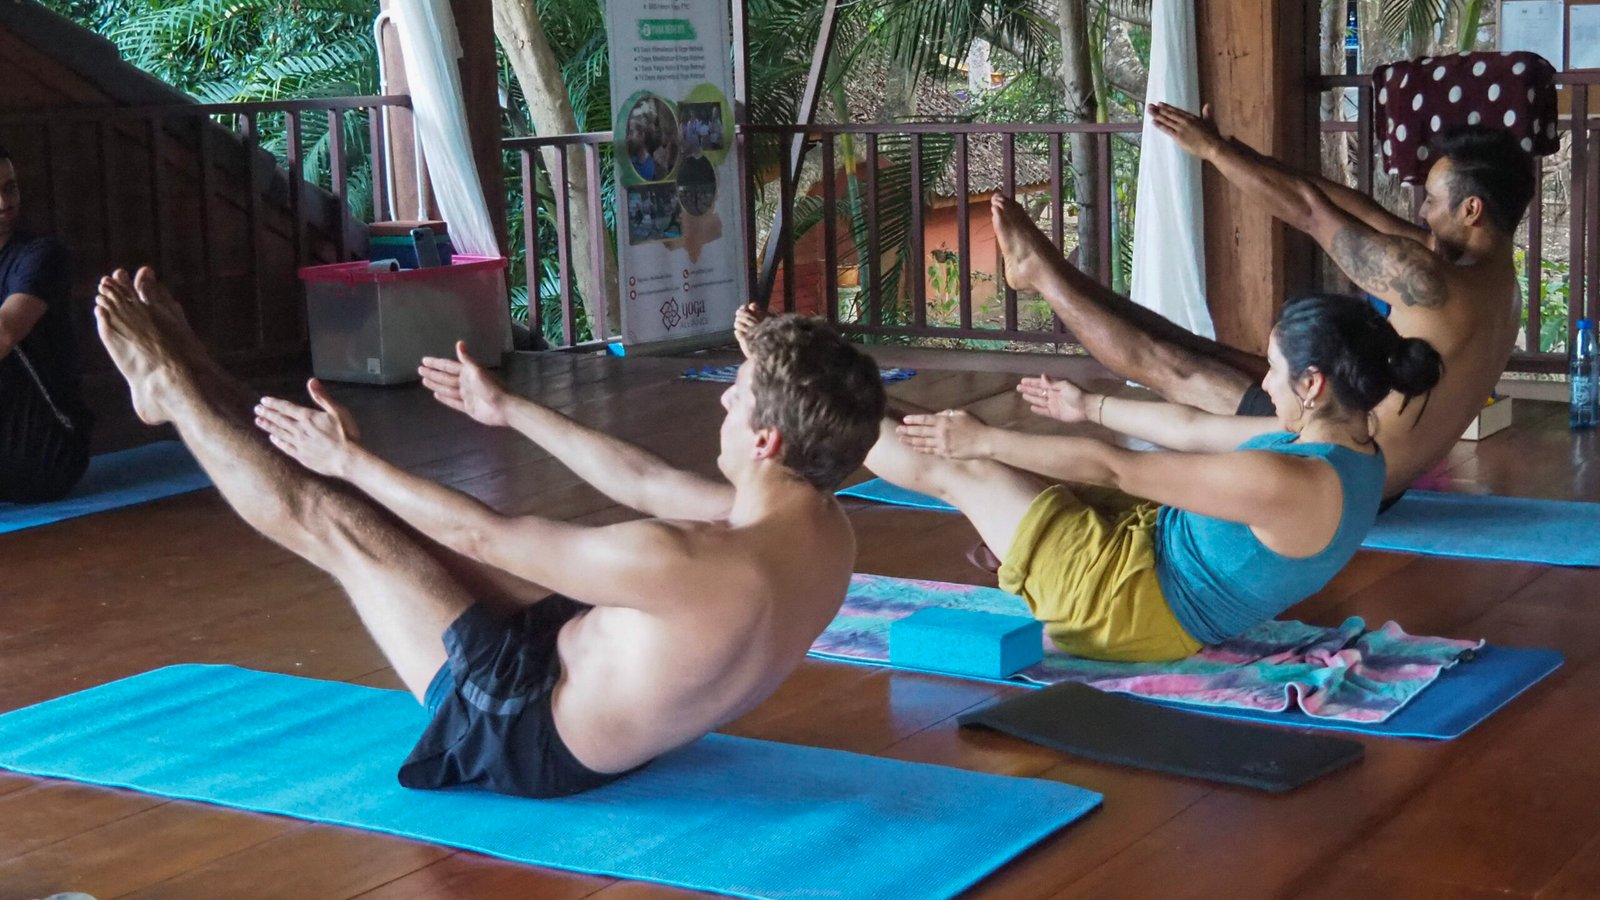
The posture allows beginning Ashwa Sanchalanasana in a standing position. Exhale and move your right foot back making it rest on the ground. Your heel must be elevated but your toes must be outward.
The left knee should bend upward in the line such that it is positioned directly over ankle. Make sure your hips are square and forward facing. In the standing position, both feet are to be grounded.
Keep breathing in deeply as you put your arms over the head and extend through the fingertips. Take the shoulders down to allow room in the upper section.
Look in front with purpose. Experience the straightening of your back and stretch through your hip flexors of the back leg. Staying in this posture, take some breaths, sinking more and more with each out-breath.
then come out carefully as you step back and stand up facing the opposite direction.
Must Read: 300 Hour Yoga Teacher Training in Chiang Mai
Ashwa Sanchalanasana modifications will help improve your experience of this pose and suit the needs of different skill groups. One of the things the beginners may concentrate on is a broader position that is stable and balanced. Such adaptation makes it possible to be closer with the ground.
In case your hips or hamstrings are tight, you may put blocks underneath your hands to give them additional support. This modification allows one to find matching without stressing.
People who want to incorporate an extra challenge should strive to bring the back leg up even farther as they use their core. This variation makes the pose more intense and makes it stronger.
Advanced practitioners could also add variation of arms in that one arm is straightened and the other is stretched behind. This complicates it and makes it more involve both the body and the mind.
You should listen to your body on the practice; it should not be difficult, and adjustments must be caring. Discover these variations sensitively to see which one appeals to you best in Ashwa Sanchalanasana.
In order to strengthen yourself and become more flexible in Ashwa Sanchalanasana, a good warm-up exercises should be done. Clinching hip flexors and hamstring with dynamic stretches will help you to prepare.
Lock in the core muscles in the pose. Having a firm centre provides support to the balance and stability which enables you to maintain the pose longer.
Be thinkful of incorporating resistance training into your schedule. Training the legs can be done through normal exercises such as lunges or squats that create strength in the legs, which allows easier descent into the Equestrian Pose.
Do not have a hurry in progress. As you are more comfortable, hold each variation of Ashwa Sanchalanasana longer. Progress with the stretch and keep it in alignment.
The most important thing is breathing; take large gulps of air, it will relax the tight parts of your body, and as time passes, it makes your body a lot more flexible. Concentrate on deep breathing as you open to the pose and breath out slowly to relieve tension.
Ashwa Sanchalanasana practice can be life-changing, but there are generally incorrect ways to perform it, which can harm your growth. The one common mistake happens to the front knee alignment. Make it sit right above the ankle so that your joints are not strained.
The other error is failure to use the core muscles. This pose helps improve flexibility and strength as stability and balance are achieved by the strength of the core of the body.
Most practitioners also do not pay attention to the position of the back leg. Become sure that you have a stable stance with a heel that is on the ground. This assists to keep the form correct during the stretch.
During the training as well, breath control is sometimes overlooked. You may concentrate on slowly breathing in and breathing out to make your Ashwa Sanchalanasana more relaxing and profound.
Finally, do not be in a hurry when changing things. Enter and exit the pose mindfully; this gives awareness of body postures as well as avoids injuries or pain during the process.
Practicing Ashwa Sanchalanasana, one must learn to listen to his/her body. This posture involves balancing and close attention, and one should use caution if one has just an injury or chronic ache in knees, hips or low back.
Pregnant women are advised not to use this pose too because a pressure on the abdominal part can be caused. Even new movements should be applied during pregnancy only with the consultation of a healthcare expert.
You may want to adjust the pose and avoid posting it with an experienced instructor in case you suffer high blood pressure or some heart issues.
New people might have their problems with the details, so it is convenient to use helpers such as blocks. When performing this dynamic posture, being well aligned is important in order to avoid straining and injury. Your security is what matters most when you are digging deep into Ashwa Sanchalanasana.
The positive effect of Ashwa Sanchalanasana, in your yoga practice, cannot be overemphasized. It is a posture that helps to build a bridge between the strength and flexibility that helps to stimulate growth in the body and the mind. When you make this dynamic pose to your practice, you are likely to realize that it improves your well being.
Ashwa Sanchalanasana can make you closer to the earth with regular practice and enable you to come up gracefully. It also instills strength in and out of the mat and teaches you how to pick yourself up when facing adversity. The pose is beneficial to all yoga practitioners either at the beginner or advanced level.
Finding Ashwa Sanchalanasana is not just a skill of the sequence, it is an experience that will draw you to intrigue the spirit of yoga itself and this involves balance, control and an open heart. Whenever you decide to enter this pose, just keep in mind that it is not always about being perfect, it is more about moving towards higher awareness of yourself and how you are in need of harmony in your life. Take every breath, feel that it carries you further in its truth and develop the power and flexibility of your practice.
For More info about Ashwa Sanchalanasana you can join 200 hour yoga teacher training in Thailand
Are you up to the challenge of doing yoga higher than ever before? Unless you have never looked at the beautiful arch of the Wheel Pose (Urdhva Dhanurasana)and wondered how the yoga practitioners get such a gorgeous backbend, you have not been alone! This empowering pose is not only impressive to look at, but it is a mine of bodily and mind perks as well. Regardless of whether you want to get stronger, more flexible, or you are just intimidated to get on the mat and test, the Wheel Pose can lead you to opportunities, which you will enjoy. In this blog post, we will deconstruct all the possible things a beginner should know about it: what are its mind-blowing advantages, how one is supposed to learn it, step-by-step guidelines, and most important suggestions on how to master it. So unroll your mat, and be prepared to be both empowered and focused within your cores of yoga, you will not regret the trip to balance and strength that it brings!
Urdhva Dhanurasana is also known as the Wheel Pose and is probably the most thrilling and empowering yoga posture. It opens your heart, opens your whole body and tests both physical and mental boundaries. Whether you be more interested in increasing flexibility, gaining strength, or simply need a reprieve of blissful escape against the pressures built up by everyday life this pose has so many solutions. Have you ever seen more experienced yogis seamlessly jump into this colourful backbend and think that you would never be able to do the same? Then think no more! After suitable preparation and instructions, any person may learn to perform the Wheel Pose. The time has come to wrap all the advantages of this life-changing pose, tips on how to execute it and even some more advanced versions to make the practice of yoga appear even more beautiful to you.
Must Read: 300 Hour Yoga Teacher Training in Chiang Mai
A wide range of physical benefits can be listed as the effect of the Wheel Pose. It increases arm, shoulders and legs strength, and body flexibility as well. When you come into this backbend, the spine elongates and you expand which leads to a better posture.
Practicing the Wheel Pose can be a mind-changing thing on the psychological level. The fact that it is a challenge is an asset to gaining confidence in the yoga journey. Every completed job gives confidence and a positive attitude.
Also, the pose is a good stress reliever. Opening the heart space and relieving the body of its tension opens the space to mindfulness and clarity amid distractions in everyday life.
When you practice the Wheel Pose, you do not only change the way you experience your body but your spirit is also elevated, and that is why it is a helpful practice in any regimen.
The Wheel Pose is a body transformation vehicle. It works several groups of muscles, which helps to be strong. As you go in this backbend, you will be able to feel how your arms and legs have to work to lift your body.
This pose mainly works out the back, shoulders and the core. Through regular workout, these regions get stronger and hard.
The other amazing advantage of Wheel Pose is flexibility. Flexors of the hip and chest can easily increase the range of motion. You will also find other poses with more ease.
The stiffness of these regions starts to dissolve out as you penetrate into this pose. This not only assists in yoga but also helps to perform our everyday movements such as bending or reaching forward without having to tweak anything.
Strength and flexibility are transformed over time and commitment to the task of perfecting the Wheel Pose and so this pose is an important member of any yoga routine.
The Wheel Pose is an exceptional yoga exercise that is associated with amazing mental advantages despite its bodily requirement. This is a difficult pose to follow, and stress levels can be lowered when this is done. The expansive length and opening of the heart center releases a sense of freedom that enables you to release any stored up tension gathered during the day.
Confidence is what you will probably feel as you perfect the Wheel Pose. Once you accomplish such an iconic pose, a certain feeling of accomplishment transcends into the rest of your practice and into your life. You could become more open to challenges, not only on the mat.
Besides, breath attention during the pose contributes to mindfulness. It is through this that your mind is at peace and this leads into a form of calmness and one is more able to manage ups and downs that are brought about in life in a graceful manner. These are some of the mental aspects that need to be embraced and they will not only boost your yoga practice but also your well-being.
More Details: 200 Hour Yoga TTC in Thailand
Before you go to the Wheel Pose, you should prepare your body. Begin with the warming up exercises when you stretch your spine and hips. Such poses as Downward Dog and Cobra establish a good base.
Do concentration on stretching chest and shoulders. To technically work on those areas without having to strain it, use Bridge Pose.
This is a simple pose and if you have never done it before, then here are some of the modifications which can make you run easily. Having blocks under your hands or practicing on a wall is supportive and allows one to gain strength.
The most important aspect during this period is to listen to your body. When something is incorrect, and it does not feel right, do not insist on shoving through the pain; instead, it is vital to wait to make progress gradually.
Such types of preparations do not only make your journey through the Wheel Pose safer, but also increase confidence when it is time to go further.
It is vital to warm your body before going into the Wheel Pose. The warm-ups are used to facilitate blood flow and flexibility.
Begin by warming your spine with such stretching poses as Cat-Cow. It loosens tensed muscles and also connects your core, which is a good step towards more difficult poses.
then add a few backbends using a Cobra or the Sphinx Pose. They will also expand your chest and shoulders which require some additional efforts when moving into the Wheel Pose.
Hip-openers are not to be forgotten as well. Pose as Butterfly or Pigeon will serve to relieve the hip tension and therefore it will be less complicated to execute the pose with proper alignment.
Lastly, perform breathing exercise. Take long breaths and get mentally and physically ready to do this empowering posture.
Although the Wheel Pose is an intimidating pose to begin with, the modifications will make it friendly. Start by resorting to the bridge pose. It assists you to get your back strong and your chest nearly open.
Prop yourself up on blocks under your hand to give yourself more solid ground. This makes it easier to align more and it creates less stress when you lift into the pose.
To bend the knees during lifting up is a consideration. This change reduces the strain on your lower back, thus allowing you to concentrate more on opening up via your heart space.
When you are not comfortable having your wrists bare under your own weight then use a folded blanket or towel as a cushion. You need to remember that it is imperative that you are attentive to your body as you make these changes.
Breathe in and out and work with further variations of this energizing pose, slowly. Respect every little step taken on the way of mastering the Wheel Pose.
In order to perfect the Wheel Pose, one should lie down on the floor and put his or her back on the ground. Knees should be bent and feet in a hip-width position. Make sure you put them directly under your knees.
Then keep your fingers pointed on your shoulders and keep your hands near to your head. Squeeze your midsection and utilize your palms and your feet as you lift the hips off the mat.
Let attention be given to correct position. The shoulders need to be piled on top of wrists and the spine ought to have a natural curve. Relaxation of the chest to allow it to open will promulgate enlargement of the heart.
As you become comfortable, breath profusely during every section of this posture. This assists in not only stability but relaxation as well.
Here, strengthening exercises such as bridge pose can be used to develop the required muscle needed as support. Flexibility is also important; daily stretching of arms, and legs would help in gaining full range motion without a struggle.
In the Wheel Pose proper alignment is very important to safety and efficacy. You can start by lying on your back with the knees bent with the feet flat on the floor, hip distance apart. Press your heels near to sitting bones.
Immediately before you are getting into the pose, put the hands behind your head with your fingers pointing towards your shoulders. When planting your wrists, make sure they are in the same x to your shoulders.
You will get the core muscles to engage by pushing through your feet and hands. This aids to safeguard the lower back followed by stability in the pose.
Have an open chest, bringing shoulder blades together and down (away) toward the ears. It is important to keep the straight line between the head and the toe when doing this vigorous stretch.
Use your breath to concentrate and have each breath expand more room in the body whilst keeping the shapes through the movement.
The mistake that every person does regularly in the Wheel Pose is excessively stretching their lower back. This may cause pain and damage. Instead, focus on the use of core muscles, and this acts as support and stability.
The other fault concerns dropping so much weight on the hands instead of being spread out evenly over the feet and shoulders. Make sure to press hard on them to balance.
The alignment of the legs is also forgotten by most beginners. Make sure that your knees are right on top of your ankles when you are lifting to the pose.
And lastly, make sure that you do not jump into it without warm up. By forgoing warm-up activities the attainment of this sophisticated position may prove harder and unsafe.
Knowing about these pitfalls allows you to improve your practice with fewer risks of practising wrong form.
Wheel Pose can be defined as one of the strong poses of yoga. It does not only make one stronger and more flexible physically but also promotes clear thinking and confidence. When you embark on this pose, bear in mind that it requires time to master. Take the trip with patience and commitment.
No matter whether you are starting to practice yoga or have been a yogi for long, the benefits of doing Wheel Pose are massive. Concentrating on correct positioning, considering warm-ups, and adjusting when necessary, you will be able to move on practising safely.
The Wheel Pose is a beginner pose that can be made part and parcel of your practice, with some diligence and concentration, you can look forward to difficulty cum experience. So put on your mat and begin to practice all that can be done with this magnificent pose!
Welcome to the serene world of yoga, where every pose is a journey and each breath is a step towards inner harmony. Today, we’re diving into the transformative power of Halasana, or Plow Pose—a posture that not only stretches your body but also stimulates your mind. Imagine bending gracefully while breathing deeply; this ancient asana invites you to explore new depths within yourself, enhancing flexibility, strength, and calmness in ways you never thought possible. Whether you’re a seasoned yogi or just starting out on your mat, join us as we uncover how mastering Halasana can elevate your practice and leave you feeling rejuvenated both on and off the mat. Get ready to bend, breathe, and benefit!
Halasana, also known as Plow Pose, is a transformative yoga posture that invites you to bend, breathe, and benefit in ways you might not have imagined. As you find yourself lying on the mat with your legs overhead, there’s an exhilarating sense of surrender. This ancient pose offers more than just a quirky angle; it serves as a gateway to deeper physical and mental benefits.
Whether you’re an experienced yogi or just beginning your journey, Halasana can elevate your practice. It encourages flexibility while grounding you in the present moment. Let’s explore how incorporating this unique pose into your routine can enrich both body and mind—bringing balance to the chaos of daily life and enhancing overall well-being. Ready to dive into the world of Halasana? Let’s go!
Halasana, or Plow Pose, offers a wealth of benefits for both the body and mind. This transformative pose enhances flexibility by stretching the spine and hamstrings. As you deepen into Halasana, you’ll notice improved posture—an essential element for overall wellness.
The calming effect of this pose can help alleviate stress and anxiety. As you breathe deeply in Halasana, your mind begins to quieten, fostering a sense of peace.
Additionally, this asana stimulates digestion by compressing the abdominal organs. This gentle pressure aids in boosting metabolism and promoting regularity.
Strengthening core muscles is another remarkable benefit. Engaging your abdominals during Halasana supports spinal health while building resilience throughout the torso.
Embracing Halasana can lead to profound shifts not just physically but emotionally as well—encouraging mindfulness with every breath.
Halasana, or Plow Pose, is a remarkable asana for enhancing flexibility. As you transition into this pose, your spine undergoes a gentle stretch. This elongation helps release tension accumulated throughout the day.
Additionally, Halasana opens up the hamstrings and shoulders. These areas often hold tightness due to prolonged sitting or poor posture. With regular practice, you’ll notice an increase in mobility within these muscle groups.
Posture benefits are equally significant. By encouraging proper spinal alignment during Halasana, it reinforces awareness of body mechanics. This mindfulness can translate into everyday activities.
As you become more familiar with this pose, you may find standing tall feels more natural and effortless. Improved posture boosts confidence too—an added benefit that enhances both physical presence and mental well-being.
Halasana, or Plow Pose, offers a unique way to combat stress and anxiety. When you transition into this posture, your body adopts an inverted position that promotes relaxation. This inversion stimulates the parasympathetic nervous system, which calms the mind.
As your heart rate slows and breathing deepens, tension begins to melt away. The gentle stretch of the spine also releases built-up tension from daily activities.
Moreover, Halasana encourages mindfulness by requiring focus and concentration. As you hold the pose, distractions fade into the background. Your thoughts become clearer as you breathe deeply.
The act of surrendering in Halasana fosters a sense of trust in your body’s abilities. It reminds you to embrace stillness amidst chaos—an essential tool for managing everyday stressors effectively. Embracing this pose can lead not just to physical benefits but also emotional resilience over time.
Must Read: 200 Hour Yoga TTC in Thailand
Halasana, or Plow Pose, is more than just a striking position; it plays an essential role in enhancing digestion. When you fold your body over itself, it creates gentle pressure on the abdomen. This encourages better blood flow and stimulates digestive organs.
The inversion shifts gravity’s effect on your internal systems. As you hold Halasana, the abdominal muscles engage, which can help tone them and support healthy digestion.
This pose also aids in relieving constipation by promoting peristalsis—the wave-like muscle contractions that move food through the digestive tract.
Moreover, with improved circulation comes increased nutrient absorption. As oxygen-rich blood flows to vital organs, their efficiency boosts overall metabolism too.
Embracing this pose regularly may lead to enhanced energy levels throughout the day as your body effectively processes what you consume.
Halasana, or Plow Pose, offers exceptional benefits for strengthening your back and core muscles. As you transition into this pose, the alignment encourages engagement of the spinal muscles. This helps build stability and resilience in your back.
When your legs are extended over your head, gravity works to activate deep core muscles. This not only improves strength but also enhances balance during other yoga poses. A strong core supports posture and can reduce the risk of injury.
Additionally, Halasana stretches the spine while simultaneously toning abdominal muscles. The gentle pressure on the abdomen promotes blood flow, invigorating organ function as well. Incorporating this pose regularly cultivates a robust foundation for overall physical health.
Embracing Halasana can lead to greater confidence in challenging postures down the line. Strengthening these key areas ensures that you practice safely and effectively as you progress through your yoga journey.
To practice Halasana safely, start by ensuring your space is clear of obstacles. This will allow for a smooth transition into the pose.
Begin lying flat on your back with arms alongside your body. Engage your core and lift your legs toward the ceiling at a 90-degree angle.
Slowly roll onto your shoulders, bringing your feet over to touch the ground behind you. Keep your neck relaxed and avoid putting pressure on it.
If you’re new to this pose, use a folded blanket under your shoulders for added support. This modification helps in maintaining comfort while you learn the position.
For those with pre-existing health conditions like neck injuries or high blood pressure, consult with a yoga instructor before attempting Halasana. Listening to your body is crucial; never force yourself into any position that feels uncomfortable or strained.
Begin by lying flat on your back, arms resting alongside your body. Ensure you’re on a comfortable surface like a yoga mat.
Bend your knees towards your chest, taking a deep breath in. As you exhale, lift your legs overhead gently. Engage your core as you move into the pose.
Support your lower back with your hands for stability. Keep your elbows close to the ground and press into them for balance.
Once you’re steady, extend both legs straight up toward the ceiling. Breathe deeply, feeling the stretch through your spine and hamstrings.
Hold this position for several breaths while maintaining focus on alignment and relaxation. When ready to exit, slowly roll down one vertebra at a time until you’re back on the mat.
Starting with Halasana can feel daunting, but modifications make it accessible for everyone. Begin by using a folded blanket under your shoulders. This provides cushioning and support as you lift into the pose.
If reaching the floor feels out of reach, bend your knees slightly while keeping them close to your chest. This adjustment maintains safety and comfort without compromising the essence of the pose.
Consider placing bolsters or cushions beneath your feet to elevate them. This added height allows you to experience the benefits of Halasana without straining.
Always listen to your body. If any discomfort arises, ease out of the pose or revert back to a more familiar position like Child’s Pose until you’re ready again.
Take your time exploring these modifications. Each step brings you closer to mastering Halasana in due course.
Before practicing Halasana, it’s essential to consider any pre-existing health conditions. Individuals with neck issues should avoid this pose, as it puts considerable pressure on the cervical spine.
Pregnant women are advised against attempting Halasana due to potential strain on the abdomen and changes in balance. Those with severe back problems or herniated discs should consult a healthcare professional before incorporating this pose into their routine.
If you have high blood pressure or eye conditions like glaucoma, Halasana may not be suitable for you either. Always listen to your body; if something feels off during practice, it’s wise to stop immediately.
Consulting a yoga instructor familiar with your personal health history can provide tailored advice. Safety should always come first in your yoga journey, allowing for growth without risk of injury.
To fully enjoy the benefits of Halasana, it’s essential to integrate it thoughtfully into your yoga routine. Begin with gentle poses that focus on warming up your spine and legs. Poses like Downward Dog or Forward Fold prep your body for the deep stretch ahead.
As you transition to Halasana, consider sequencing it near the end of your practice. This allows your body to be adequately warmed up while also benefiting from its calming effects after more vigorous movements.
Pay attention to how Halasana feels within a flow. You might want to pair it with restorative poses such as Child’s Pose afterward for a soothing cooldown.
Experimenting with different variations can keep things fresh and engaging, enhancing both flexibility and strength over time. Embrace this pose’s versatility; each session offers an opportunity for growth in both body and mind.
Warming up properly for Halasana can enhance your experience and prevent injuries. Start with gentle stretches to prepare the body.
Child’s Pose is a fantastic way to ease into your practice. It relaxes the spine and opens the hips, setting a calm tone.
Next, try Downward-Facing Dog. This pose lengthens the spine while stretching the hamstrings and calves—muscles that play an essential role in Halasana.
Follow it with Shoulder Bridge Pose. This movement strengthens your back and engages your core, both crucial for maintaining stability in Plow Pose.
Lastly, incorporate Legs-Up-the-Wall Pose to create awareness of leg mobility while promoting relaxation. Each of these poses gradually prepares you for Halasana’s benefits without overwhelming your body from the start.
When incorporating Halasana into your yoga routine, it’s essential to create a balanced flow. Start with gentle warm-up poses that open the shoulders and hips. Poses like Downward Dog or Supta Baddha Konasana prepare your body for the deeper stretch.
Transition smoothly from standing postures to seated ones before moving to Halasana. This helps ground you mentally while enhancing flexibility in your spine and legs.
After practicing Halasana, counter-pose it with restorative stretches such as Fish Pose or Child’s Pose. These will help release any tension created during the pose and bring harmony back to your practice.
Remember, listen to your body throughout this sequence. Adjust timings based on how you feel, ensuring each transition is fluid and intentional. Keeping these tips in mind can elevate both your experience of Halasana and overall practice quality.
All those of you who have been exercising for a long time, and are a professional already know about core exercises. Many people think that only aerobic exercises help to lose weight and look lean. However, you should know a fact. When you lose weight through aerobic exercises, it may lead to sagging of the skin. More often, than not, you only tend to lose the water content in the body. If you practice core strengthening, you will see your muscles getting toned eventually. Core exercises are an integral part of a comprehensive fitness program.
You should know about a few benefits of core exercises, before delving into yoga for core strengthening.
1. Core exercises improve your balance as well as stability. You can impact your pelvic muscles, lower hip muscles, and abdomen in a positive manner. No matter, if you are an athlete or want to engage in daily activities, such exercises will help to make your core muscles stable.
2. You can do core strengthening exercises quite easily, and anywhere. It is due to the fact that they do not require any sort of specialized equipment. If you use your back muscles and abdominal muscles in a co-ordinated manner, it can strengthen your core.
3. When you have strong core muscles, you can go about your daily tasks, without fail. On the contrary, weak core muscles can lead to poor posture and back pain.
Apart from your quintessential fitness program, and gym equipment, you can also strengthen your core muscles. Here we are talking about yoga. Yoga poses can help in core strengthening.
You may also hear the name locust pose associated with the yoga pose. This is a staple in most yoga classes. If you suffer from any kind of shoulder disorder, like frozen shoulder, then also you can practice this. The pose helps to strengthen the back muscles and also opens up the chest. It also leads to the strengthening of the entire core. You have to perform this asana, by lying face down on the floor. The arms should be by your torso, on either side, with palms up. With the forehead as support, you should slowly lift both your legs stretched straight to a certain height, as per your comfort. Your glutes and hamstrings should contract, as you lift both legs upward. You also need to lift your pelvis, to lift your stomach from the floor. This are one of the best core strengthening exercises, that you can do today. It also aids in digestion and alleviates back pain.
The boat pose can be as challenging, as you make it. It makes you pull your lower abdominals together, to lift your legs up. If you cannot pull your legs straight in the first place, do not worry. Most of you may not be accustomed to such poses, and your hamstrings may be tight. Just extend your legs as long as you can, and allow your hip flexors to relax and focus on the abs. You can just lie down on your back, and inhale and exhale deeply while lifting your chest and legs off the floor. You ought to keep your arms stretched forward, while pointing your fingers towards the feet. Your buttocks should touch the floor. The body resembles a boat in this pose. This pose helps in the strengthening of the core muscles.
You need to perform the asana, while standing on one foot. It is very difficult to balance the entire body, on one foot. However, you can achieve equilibrium, with practice. The asana is all about balancing. This pose helps you to focus on lengthening your body. You need a lot of core strength, to keep your body in that position. In the process, you need to pull the abdomen towards the spine. You can perform the asana, by standing straight on the ground. Raise both the hands above the head. Inhale slowly while doing so. You need to expand your chest, while doing so. Bring both hands together, and interlock the fingers. You have to bend your body forward, whilst in this pose. And, while doing so, lift one leg up and maintain it parallel to the ground. Hold the pose, and then release and come back to the original form. Repeat on the other side.
This is quite a challenging pose, which can strengthen your core muscles like no other. It is basically an arm balance pose, which needs you to contract your core abdominal muscles. The transverse abdominus muscles work quite hard. You can start the pose from standing position, if it suits you. Slowly bend forward, while sticking your knees into the back of your elbows or biceps. Before, attempting this stance, you need to fold your knees a bit, and try to place the palms on the ground for support. Now, begin to push your weight forward, on your arms. First, try the pose with one leg if you are a beginner. For professionals, you can achieve the final pose in one go, with both your legs. This is one of the best yoga exercises, to strengthen your core muscles.
You can do this pose, with ease. This may seem to be an upper-body focussed pose. However, it actually strengthens your core muscles as well. It is also quite popular as the four-limbed staff pose. You have to start the asana with Vajrasana. You have to stretch your hands forward, and take up the plank pose. Straighten your legs backwards. And, support the legs on the toes. Exhale and bend your elbows, until the shoulders are at the same height as the elbows. You can hold the pose.
This asana strengthens the back and abdominal muscles. Moreover, you can also maintain core stability. Sportspersons love to practice this exercise.
These are a few of the poses in Yogasana, that can give other new age fitness activities a run for their money. Try these out today, empty stomach and early in the morning, to strengthen your core muscles.
It is a known fact, that yoga deals with the mind and the body. Moreover, it never works in isolation. You can improve upon chronic pain with the help of asanas. It reduces inflammation and also improves flexibility, if done in the right manner. Yoga is the practice of the science of life. You will come across three main aspects of yoga on a daily basis. They are postures, breathing exercises, and meditation. It has been known to help patients with arthritic pain, chronic pain, and in healing various body parts.
You will read about the yoga poses that can help with back pain. Always remember to practice a few asanas or postures together to get maximum benefits. 45-60 minutes sessions are the norm. However, you can also practice in short bursts of 15 minutes for quick remedies in pain management.
This asana is quite famous as the Cobra pose. It helps you stretch to the core. Moreover, the quick release mechanism can help you ease the pain as fast as possible.
You can perform it quite easily, without much practice. You have to lie on your stomach and rest your toes flat on the ground. In the next step, you have to keep your arms bent at the elbows and place the palms on the ground. Support your torso with your palms and lift the torso, chest, and head up from the floor. While doing so, your belly should be in contact with the floor. You have to curve your spine as much as possible. Hold the position for 20-25 seconds. After the said time has elapsed, you have to get back to the normal position with the torso, chest, and abdomen back on the floor. You can repeat this four to five times. Continue to breathe deeply while performing the asana.
It relieves all the pain from the back, as well as the shoulder and neck. Additionally, it gives the body great flexibility. If you are suffering from asthma, it can help you. However, stretch as much as you can manage. Do not overdo it.
When you practice this pose, your body resembles an arched bow, ready to let go of the arrow. That is why westerners call it the bow pose. You need some flexibility to perform this asana. The main focus should be on the spine and back while you perform this asana.
In this asana, you have to lie on your stomach. Your feet should be stretched outwards straight. Initially, the hands should be by your sides. Slowly bend the legs from the knees, and try to catch your ankles with your arms. Pull yourself up from the floor, both ways, i.e., from the back and front side. Your navel should be the only part touching the ground. You should hold this position for 20 seconds. Slowly release your ankles, and take back your legs and arms to the original position. Relax.
It is very effective in the removal of back pain. Moreover, it also heals menstrual cramps and strengthens the abdominal muscles. In the beginning, if you have problems, holding your ankles with your hands, you can use a hanky or cloth tied to the ankles.
Ardha Chakrasana is better known as the half-wheel pose. And, it is a standing pose. It prepares the body for the actual Chakrasana and also provides relief from pain.
You can practice this pose easily without much difficulty. You have to stand with your feet together. The arms should be raised upwards. Additionally, you can also keep both hands on your hip. Bend backward slowly. When you bend the body backward, you have to make sure not to bend your knees. Breathe normally while performing the asana. Hold the bent posture for a few seconds, say around 10. While exhaling, come back to your original position. Repeat the asana 4-5 times for maximum benefits.
The asana helps the back and spine muscles in numerous ways. It also stimulates the abdominal muscles, while boosting your respiratory and heart health. It can also relieve menstrual pain. You can practice this anywhere, so it is one of the most convenient asanas.
You have another asana here for you, that promises to help you with back pain treatment. Some people also call it the locust pose in the western world. You can practice this asana to gain respite from back and spine-related issues.
It is one of the asanas, that beginners can also perform. You have to lie on your stomach, with your arms by your sides. Additionally, your palms have to face downwards, and you have to tuck them under your thighs a bit. The chin should be resting on the floor, with your legs out-stretched backward with toes pointing outside. While exhaling, you need to raise one leg to a comfortable level, while keeping the other on the ground. Hold the position for 4-5 seconds. While coming back to the original position, you have to inhale. Repeat the same with the opposite leg. After, this round, you can start practicing with both legs.
The benefits of Shalabhasana are immense. It strengthens your pelvic region and back. Additionally, it also provides relief from sciatica. The strength of the spine also gets a boost. However, you should refrain from the practice in pregnancy.
Another yoga asana that can aid you in alleviating your back pain, is Makarasana. It is a purely restorative process. Some people will also refer to it, as the crocodile pose. You can strengthen your entire nervous system, apart from your back. Even a beginner can perform this asana with ease.
You need to lie on your stomach, to perform the asana. Thereafter, you need to bend the legs sidewise, with the toes sticking outwards. You can bring both hands in front, fold them, and rest your chin or put your head down. Hold the position for a few seconds. Breathe deeply while performing this asana. You can do the asana in various ways according to your comfort levels.
This will release the tension from your back. You can also get relief from stress. The only caution is that, you need to refrain from doing this, if you are expecting.
Always practice asanas on an empty stomach, or after a gap of 2 hours, preceding your lunch or dinner. Try out these poses to alleviate your back pain today.
Read our articles on different topics of yoga, sustainability and community updates…
More DetailsLearn about yoga teacher training and how it guides you to a harmonious lifestyle…
More DetailsFind out more about hill tribes, their ways of life and how we can take part in their progress…
More DetailsFind spirituality in sustainability, living in harmony with nature and adopting mindfulness…
More Details